
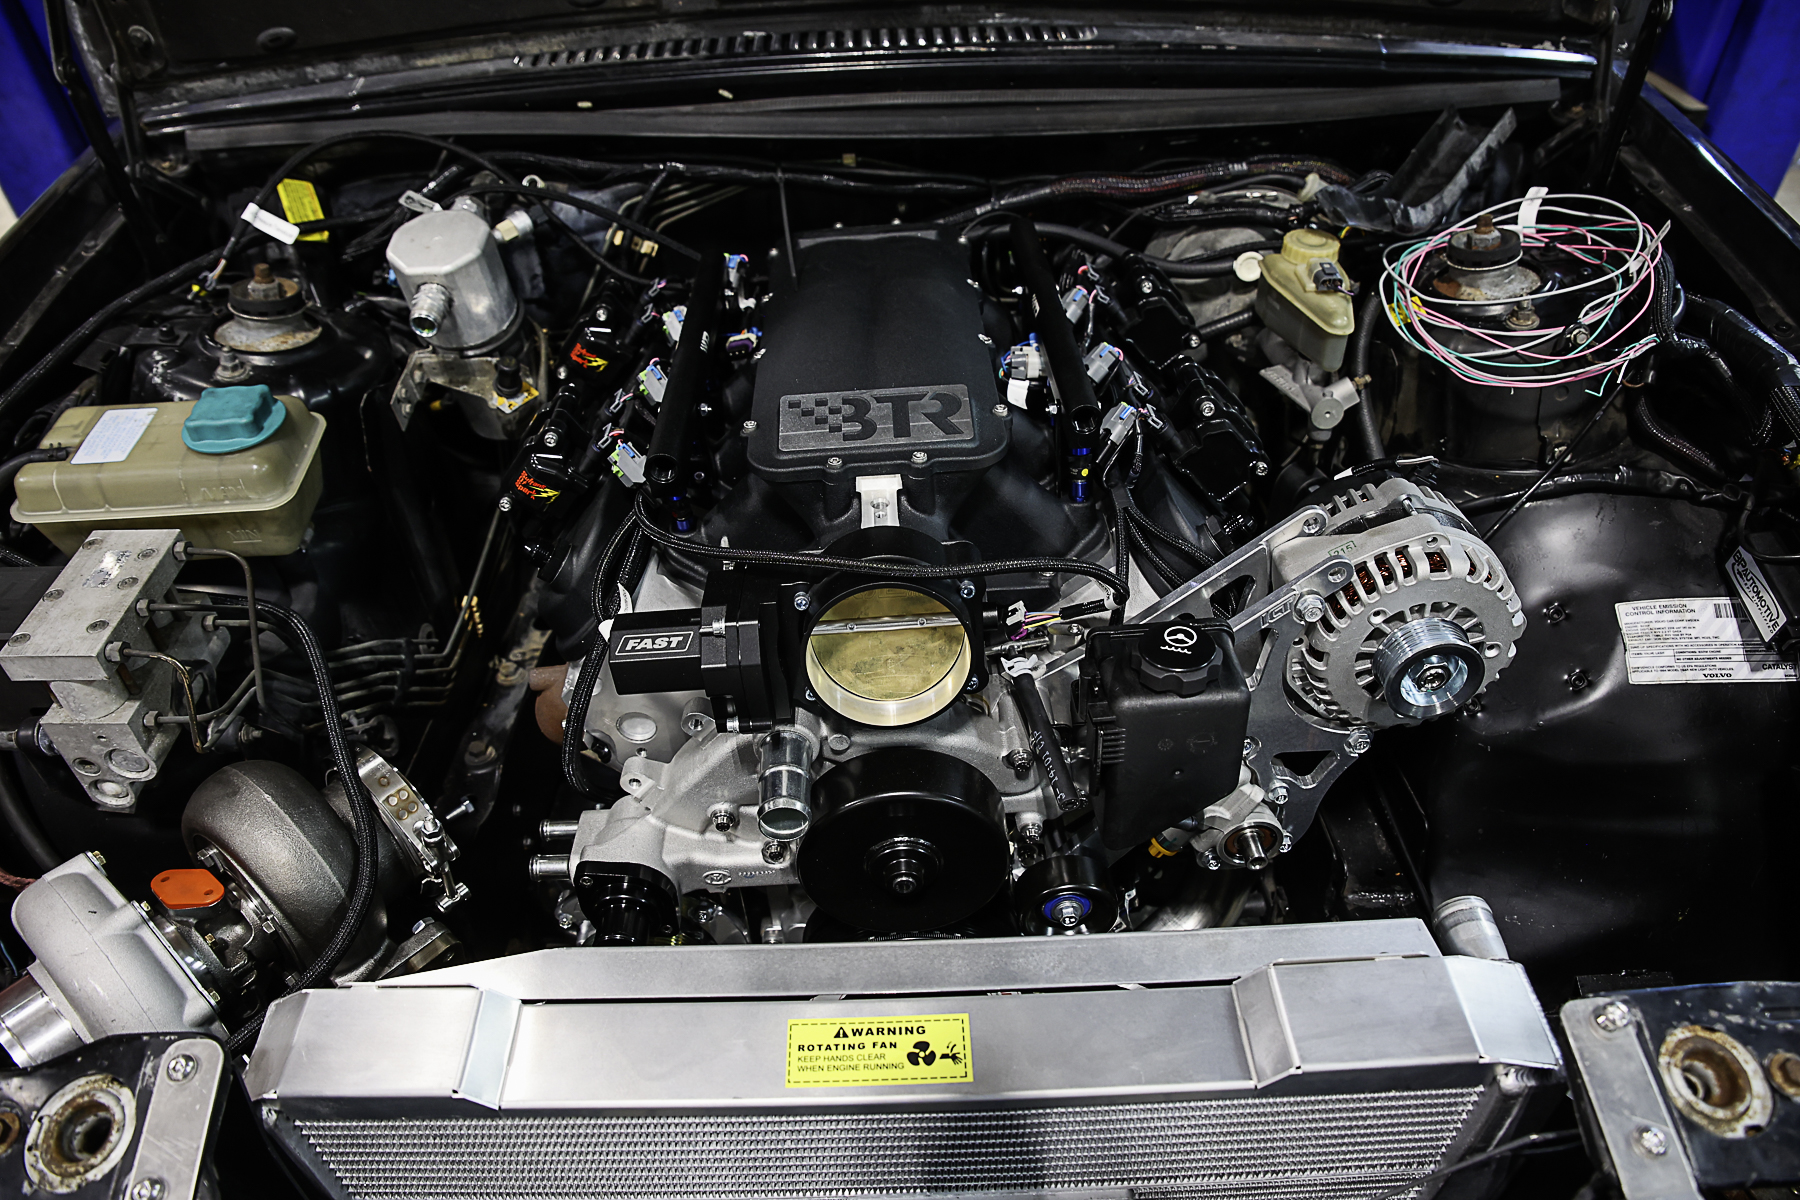
LS swaps offer both challenges and rewards, with one of the biggest challenges being fitting your chosen mill into a vintage engine bay. We’ve already made some extra room in project Swedish Meatball by installing a ProForm Slim Fit radiator. Now, we need to get the water pump, alternator, air conditioning, and power steering functional. All of that is spun on the accessory drive. In this article, we’ll cover what you need to know about LS swap engine accessory drives and how to go about installing everything correctly.
For expert advice on the layout design and mounting brackets, we contacted the team at ICT Billet. Located in Wichita, Kansas, they specialize in Made-In-The-USA CNC billet brackets and complete mounting kits for LS swaps. “We save people from having to buy the accessory components twice, which adds a lot of money and time to their build,” says ICT Billet CEO, Alan Burdue.
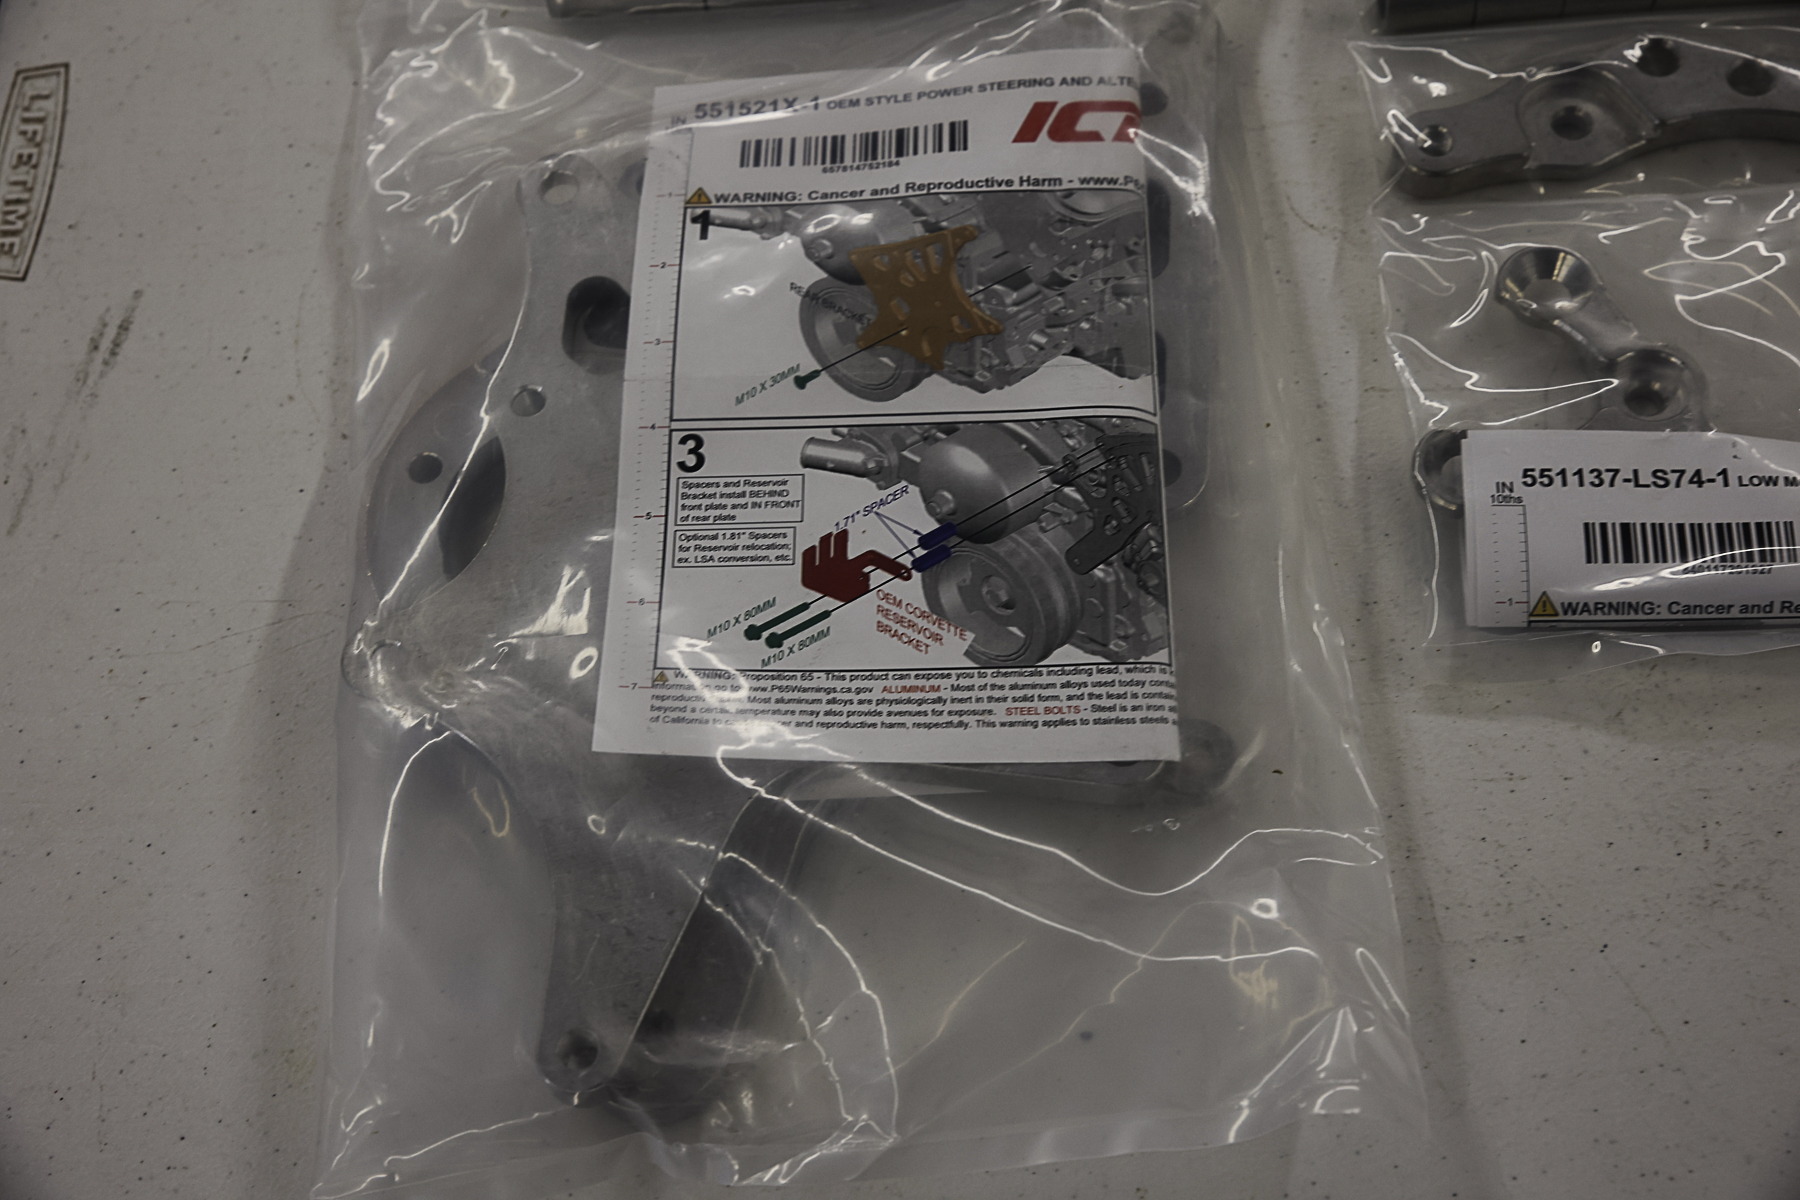

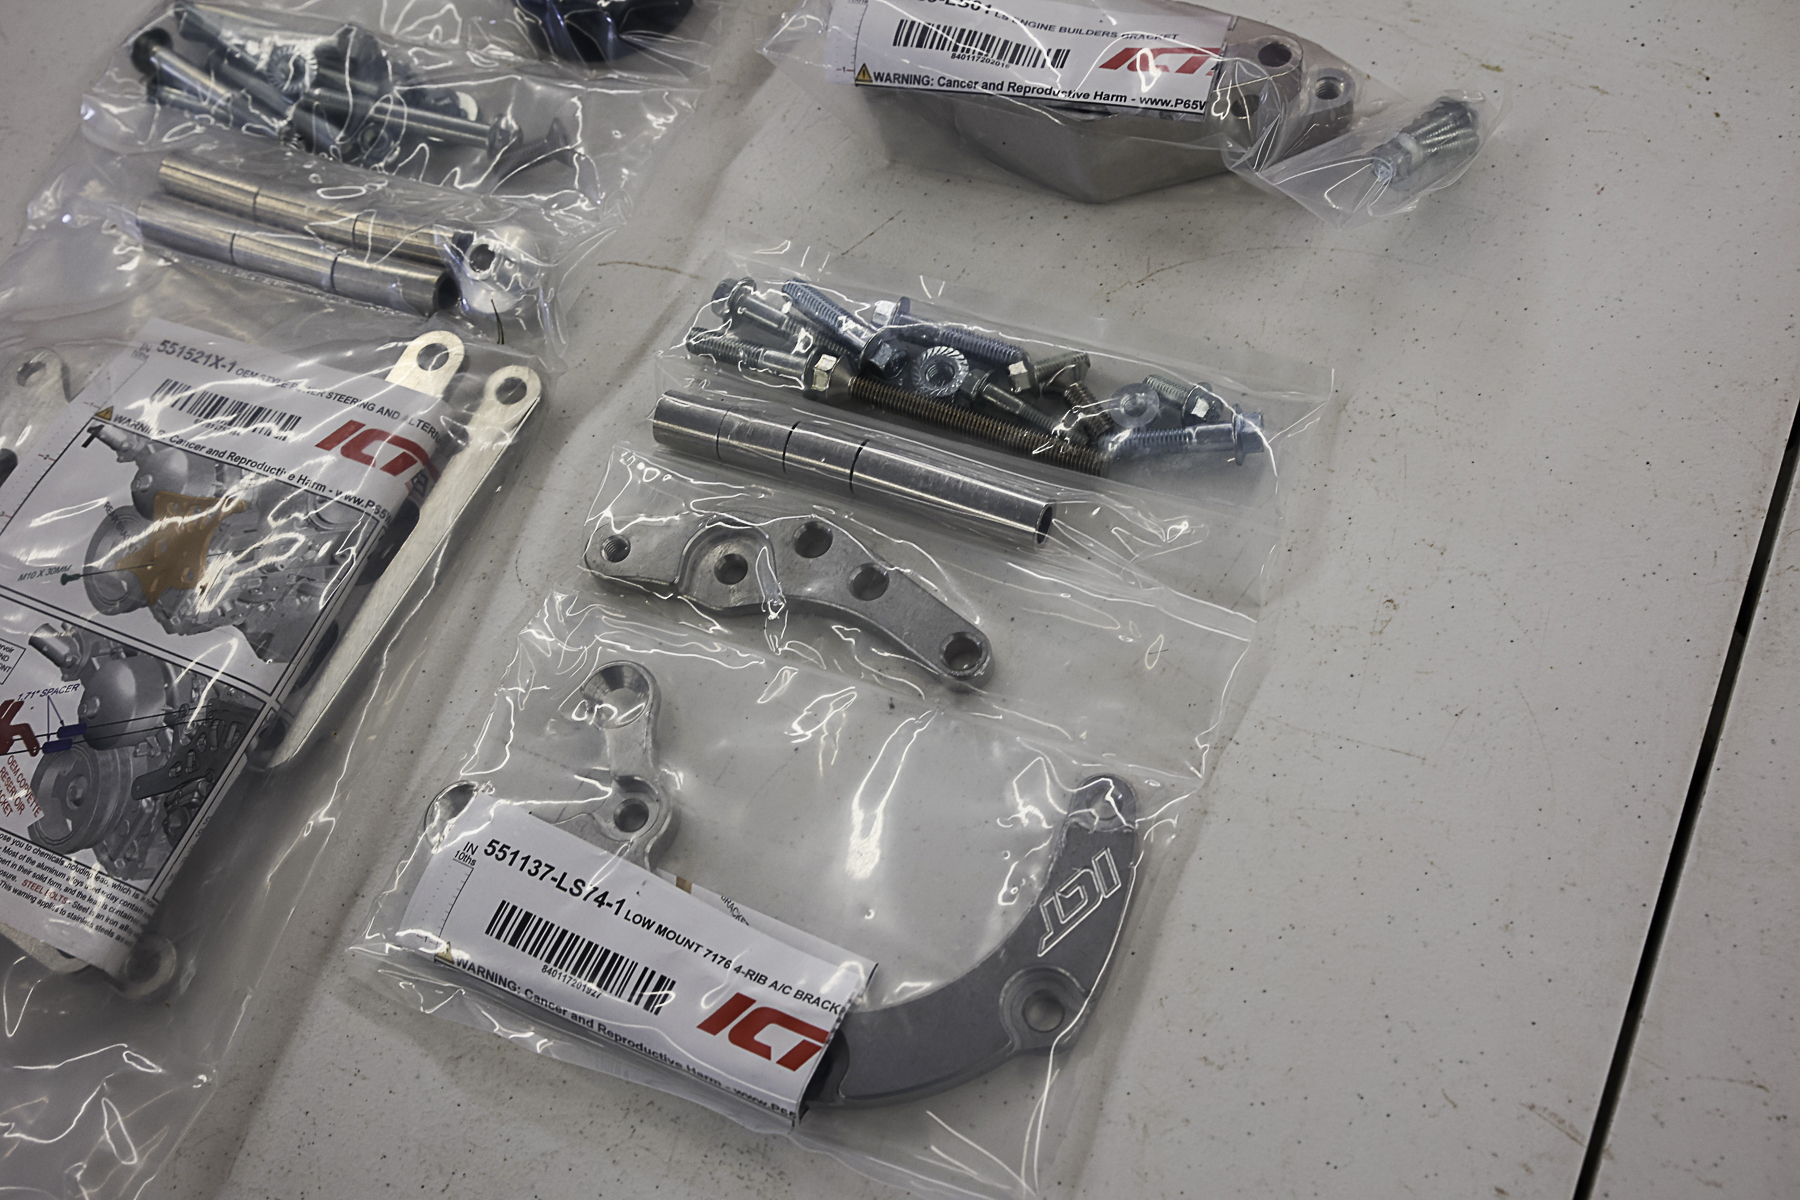
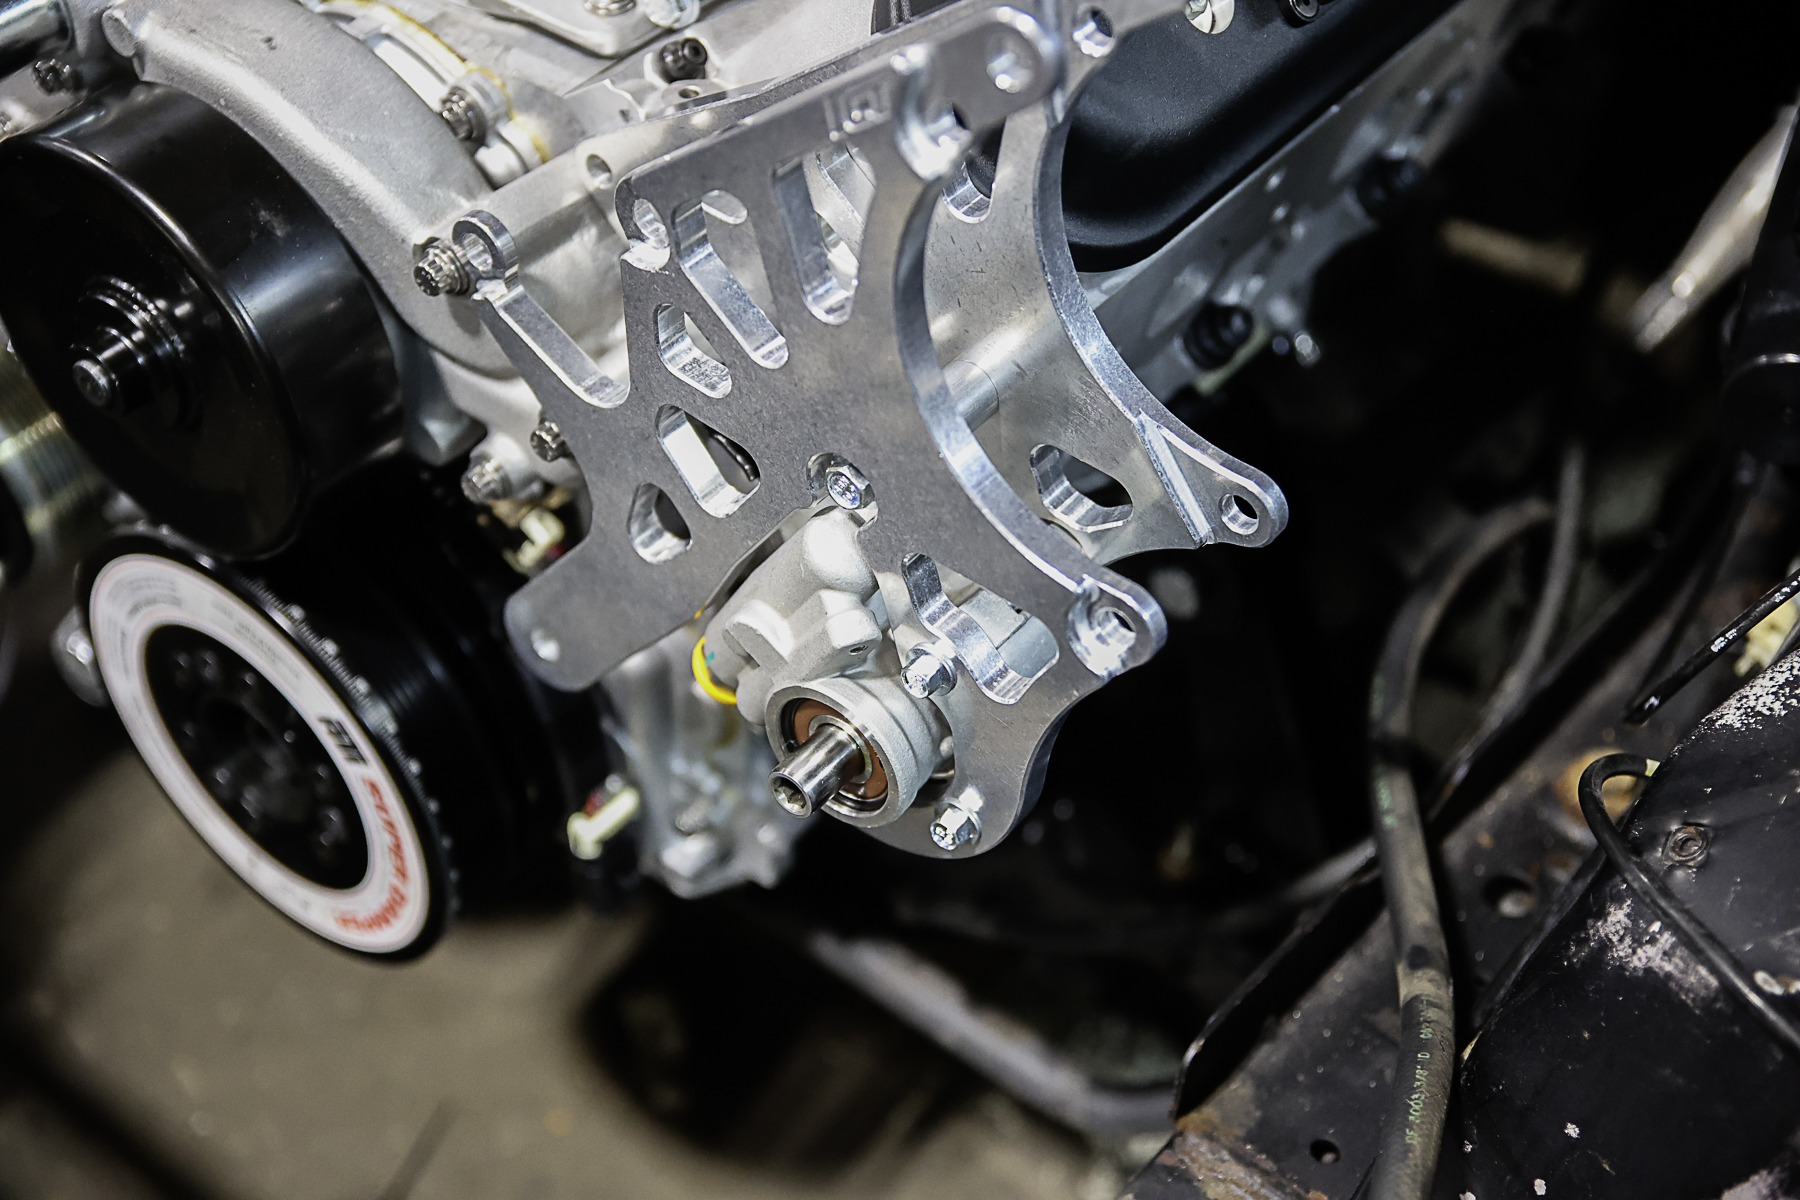
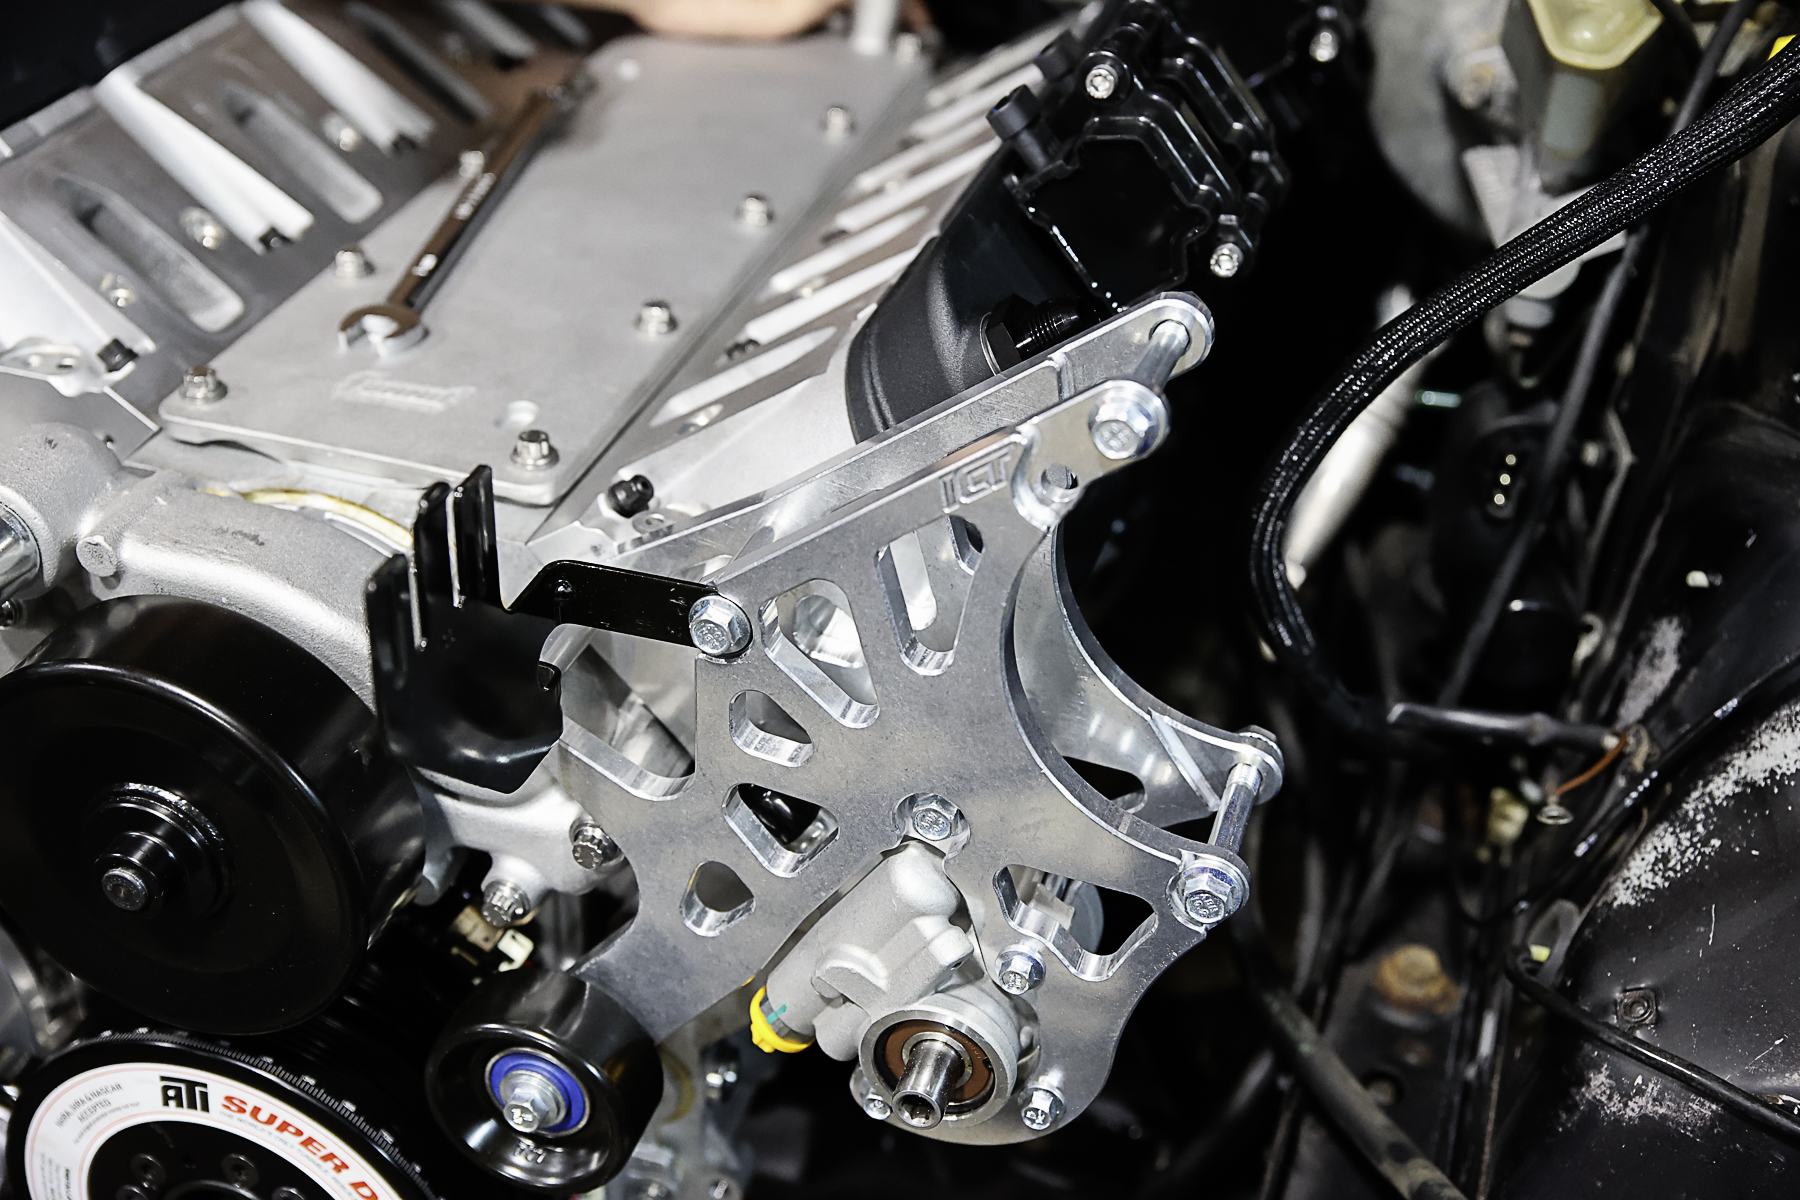
After talking with the team at ICT Billet we put together a plan for our brackets. They recommended we use part numbers 551521X1, 551169-LS01, 551137-LS74-1 for our build. This setup would allow us to add A/C, have power steering, and mount the alternator in a good spot.
How To Identify Your LS Engine Type and Accessory Spacing
While dimensionally all LS engines are the same, the OEM accessory drive could be vastly different depending on which vehicle your donor engine came from.It’s good to know what you’re getting into first if you’re pulling or purchasing a pre-owned LS, or sourcing new.
There are three basic variations of the LS found across GM model groupings. These include the Corvette / CTS-V / G8, fourth-gen Camaro and Firebird / GTO, and fifth-gen Camaro / Silverado and Sierra trucks. “The best way to determine this on a complete, unmodified engine is by looking at the intake manifold and accessory drive,” mentions Burdue.
The Corvette / CTS-V / G8 intakes are low profile, with the accessory drive closest to the block. The offset from the face of the harmonic balancer pulley to the hub is 1.4-inches. Truck intakes are tall with long runners and a 3-inch harmonic balancer pulley offset. The Camaro / Firebird / GTO intake is in between with mid-size runners and profile, and the balancer offset is 2.25-inches.
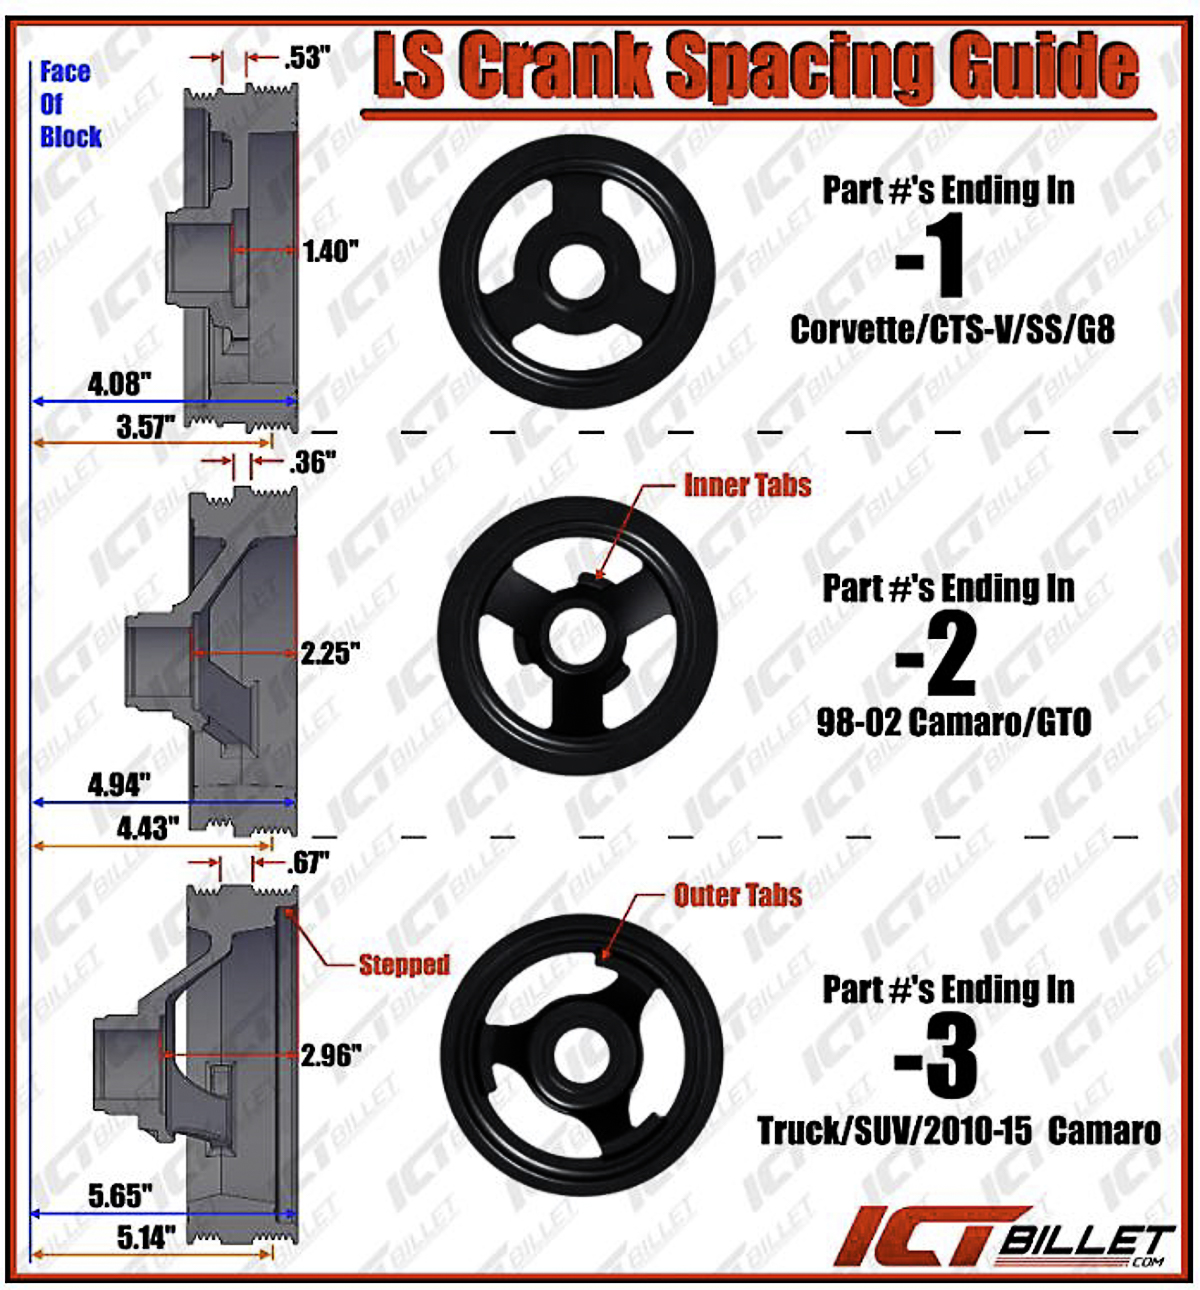
This guide is perfect for those who are trying to figure out their crank spacing.
If these are missing, then next look at the timing cover. Some LS engines are equipped with variable valve timing (VVT), and there will be a solenoid in the timing cover directly in front of the camshaft. If this is the case, then you have to move the accessory drive spacing out to the truck harmonic balancer pulley offset at 3-inches. This will allow the water pump to clear the larger timing cover on VVT-equipped engines.
“If you have a bare block without a balancer, then you can use any of the spacings for your engine,” continues Burdue. “The crankshaft and block are the same for all wet sump LS engines, aside from a couple of mounting holes on the bottom of the truck blocks, which we have brackets for that too.”
Bracket And Accessory Choices
Now that we know basic LS engine configurations, next we’ll want to consider our build theme and space constraints in our particular swap vehicle. “If this is a cruiser setup, then typically we use a lot of OEM parts such as the balancer pulley and factory-style power steering pump. Race applications typically use a manual tensioner and don’t have A/C and sometimes use a belt drive fuel pump with a remote electric water pump,” Burdue says. Once these factors are known, then ICT Billet can provide the exact brackets for your application.
With the LS swap engine being fitted in place, take a close look to see if the crossmember is going to interfere with the air conditioning compressor on the bottom side. This is reportedly common with older Camaros, G-bodies, and S-10s. You’ll also want to check for hood, brake booster, and around the alternator for clearance issues.
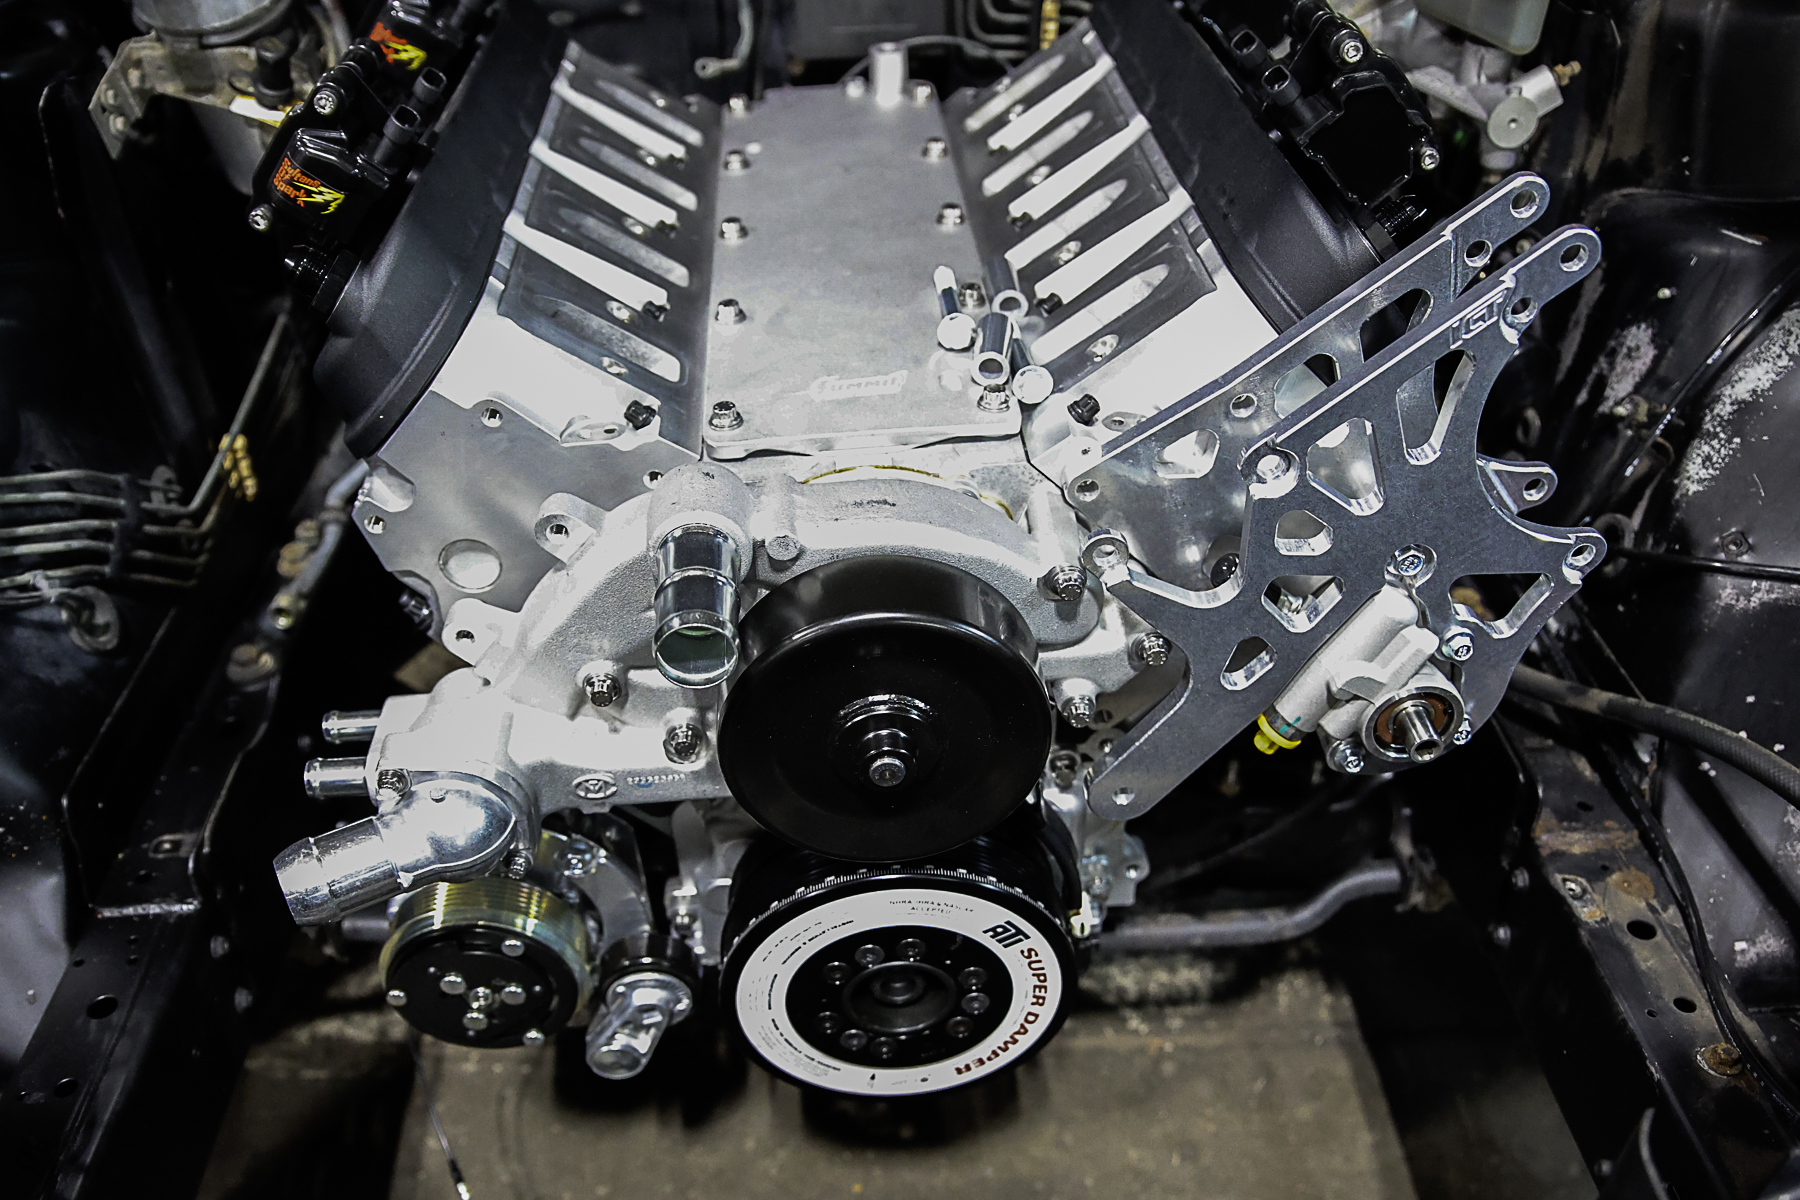
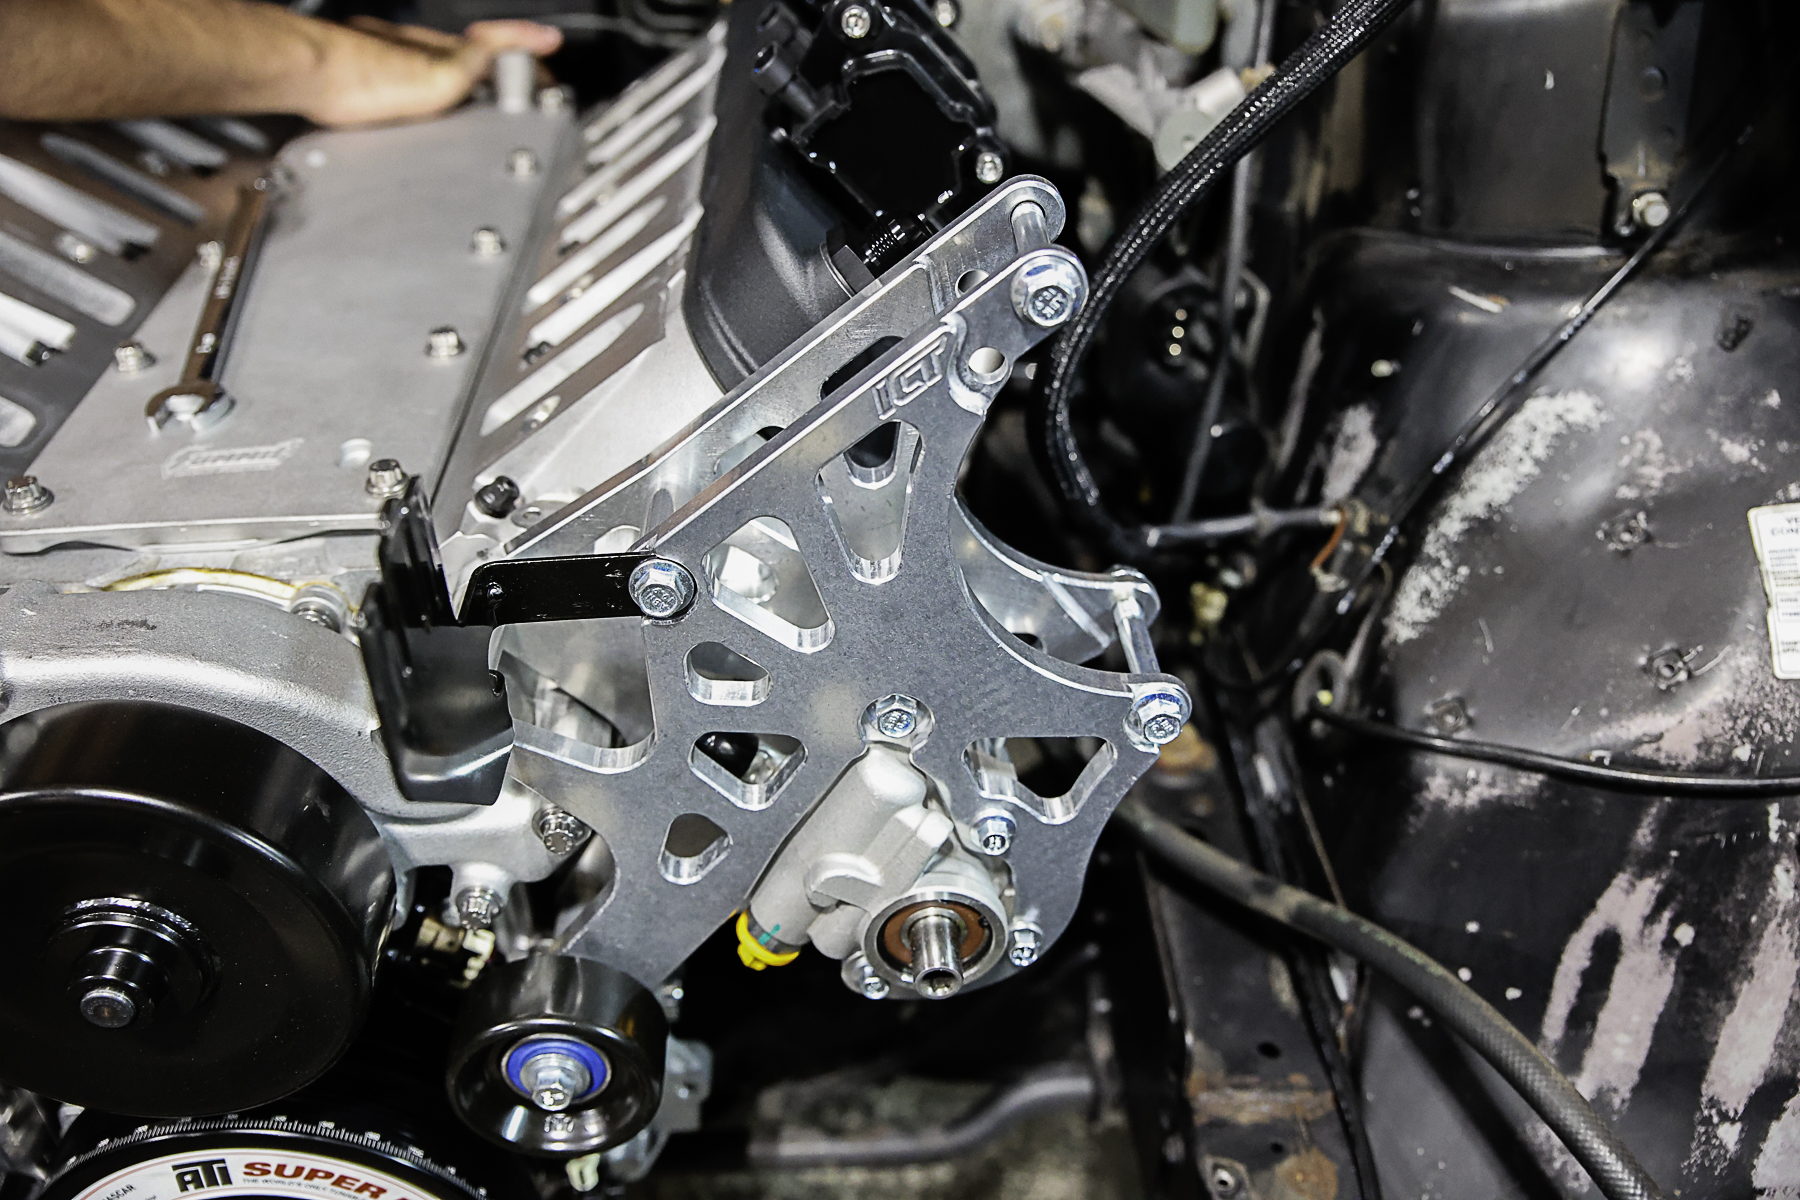
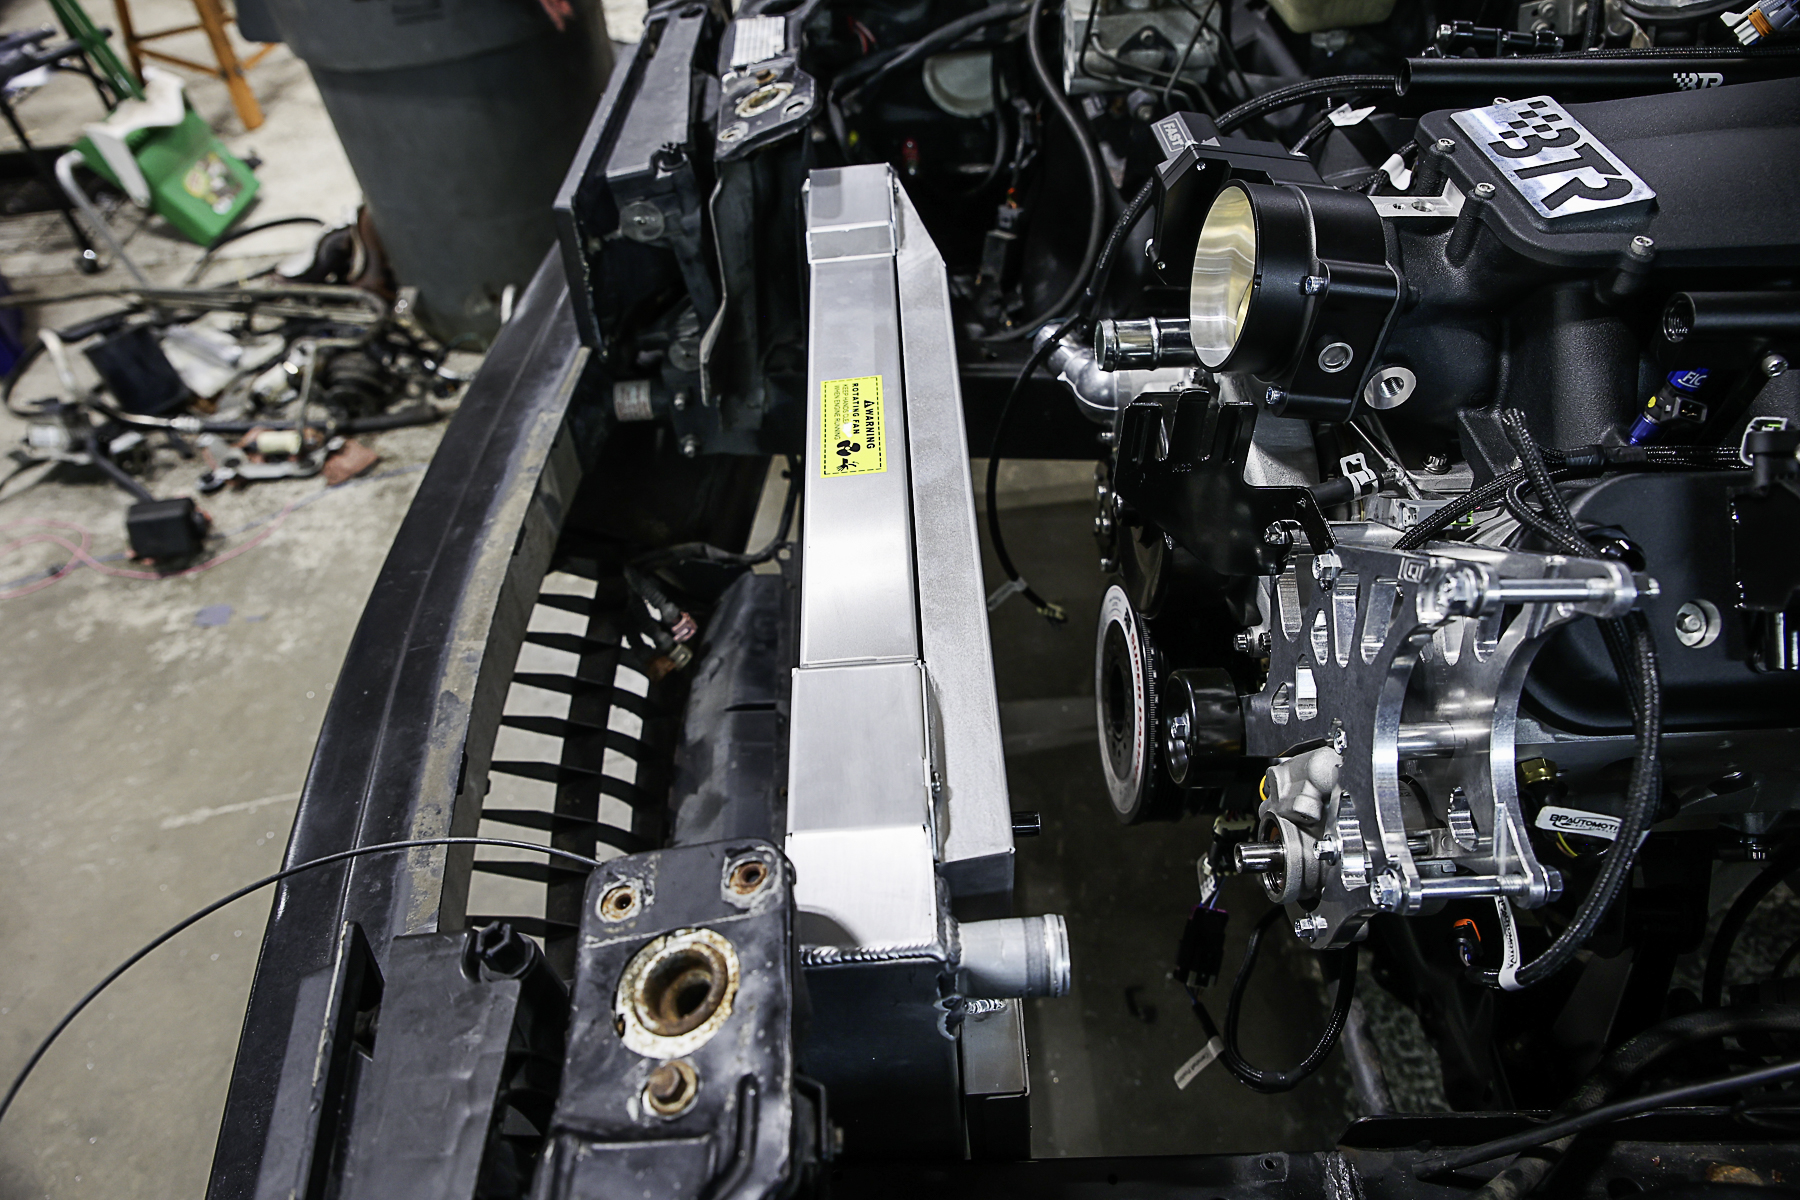
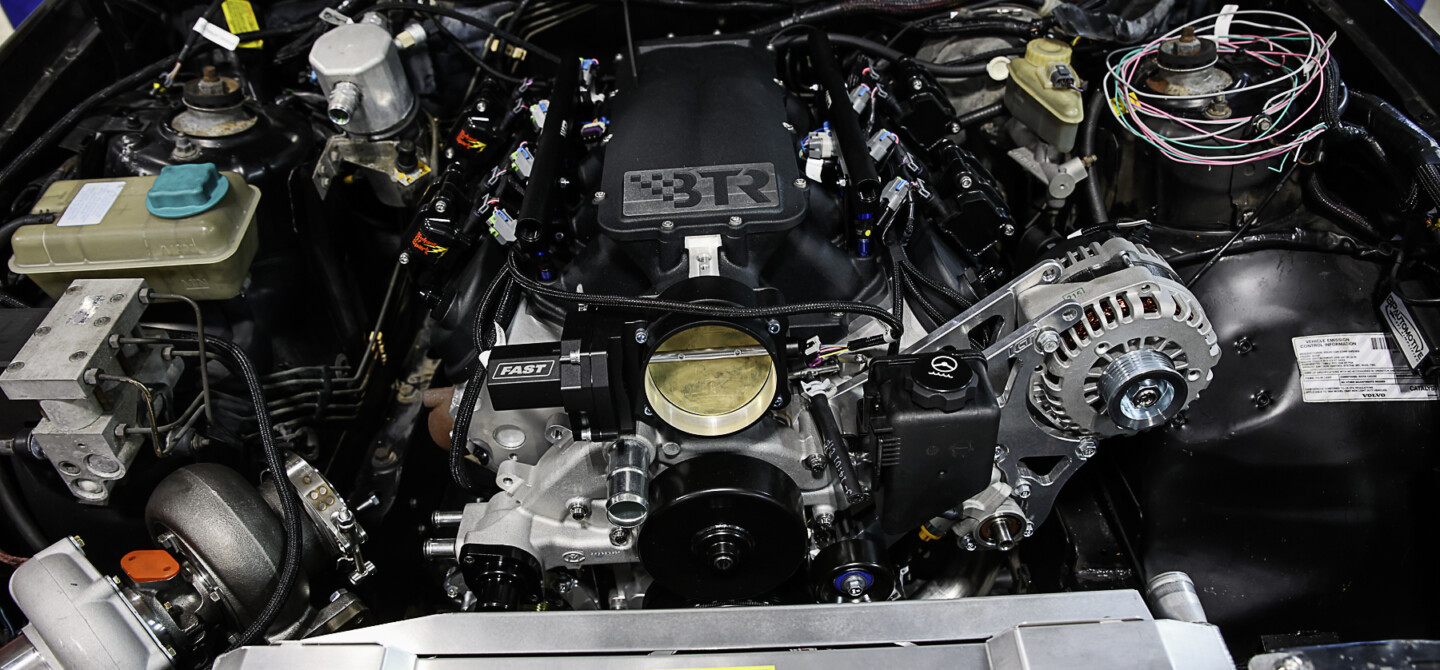
As you can see, once the engine was in the Volvo and the radiator was in place, space got tight in a hurry. Thankfully, the brackets we got from ICT billet positioned all of our accessories in optimal locations and gave us room for the turbo kit.
For the best layout on a typical LS swap, ICT Billet recommends going with a 3-inch truck offset spacing. “They have the most options available and will tuck the accessories in tight around the water pump for a clean look,” Burdue states.
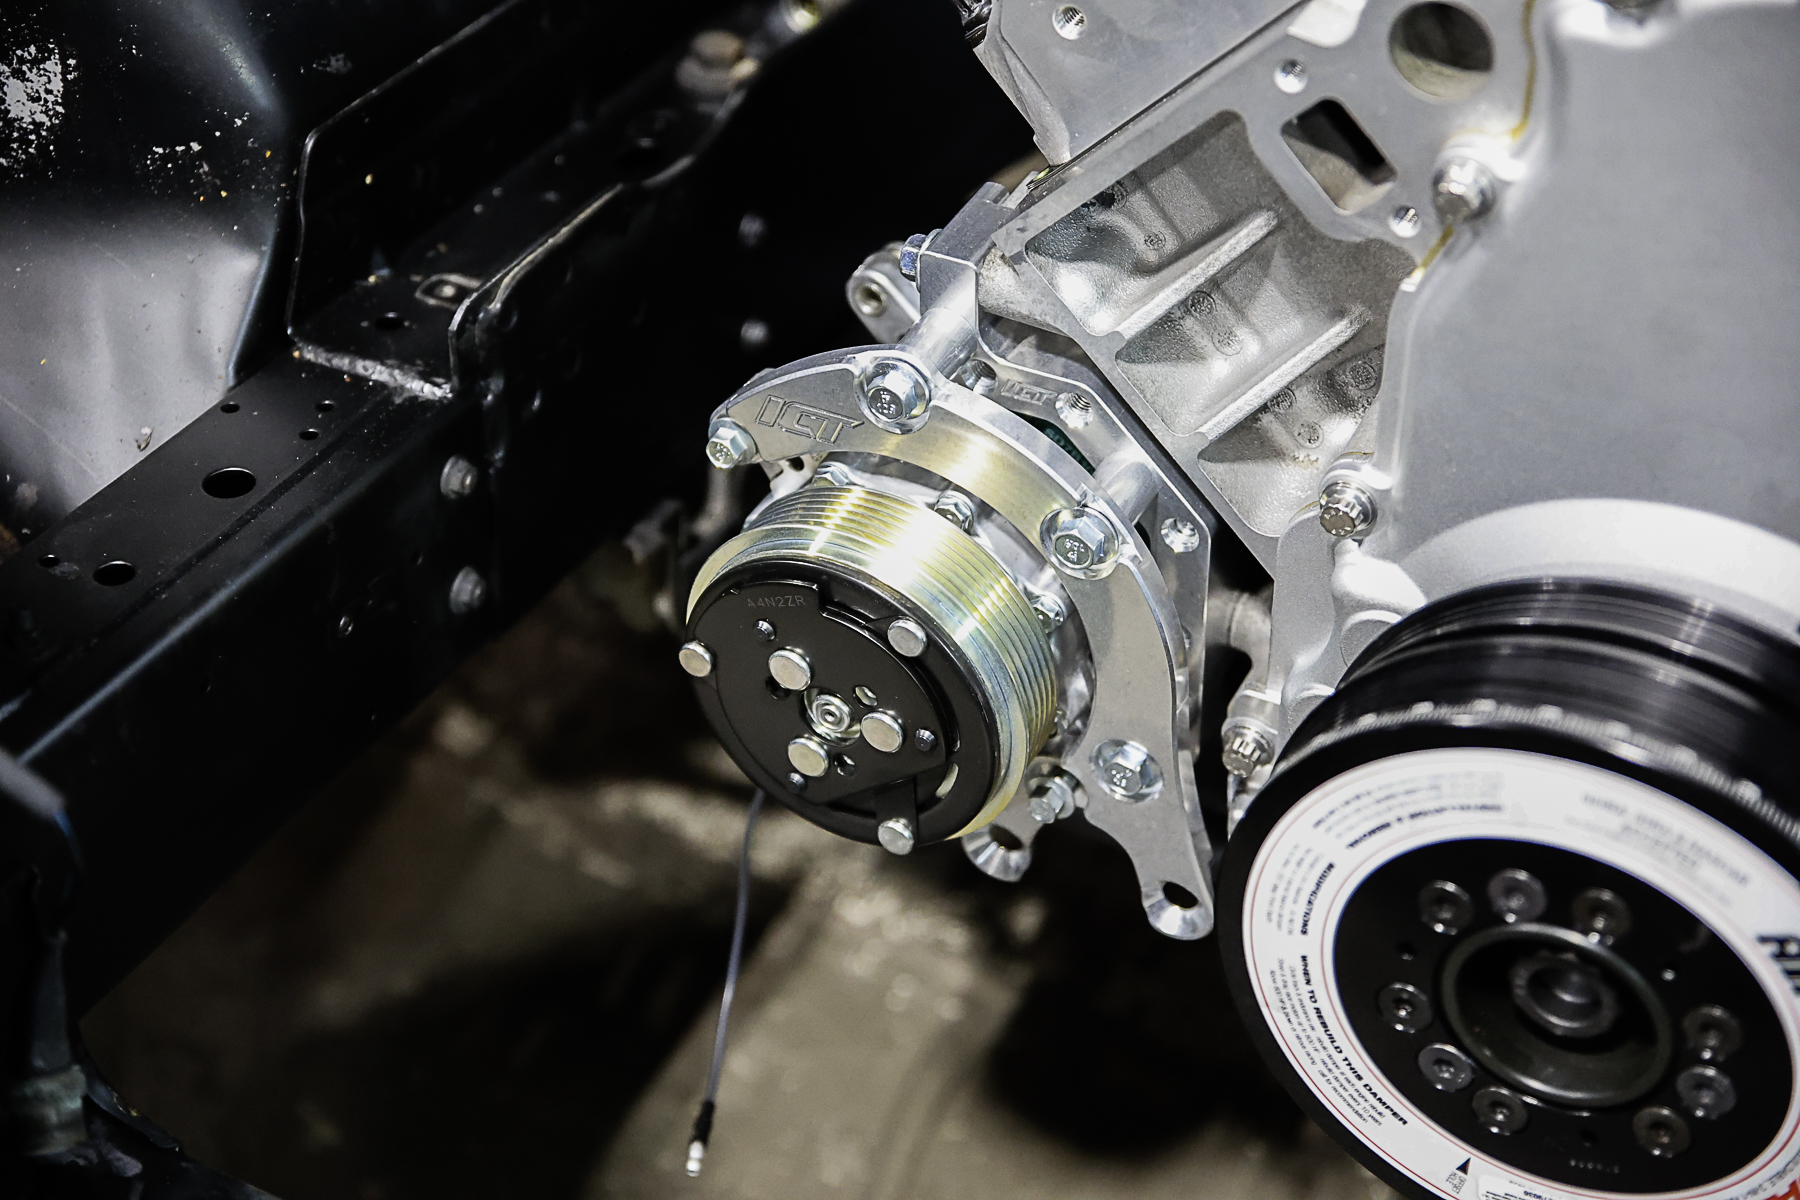
When it comes to the accessories for the swap, you don’t need to get fancy. The OEM-style LS1 water pump works great for many applications and will provide clean hose routing. You’ll want to use an alternator that will cover your amperage needs. “We recommend using the factory power steering pump, so the pressure and volume remain the same, so your steering feel is not affected. If not, you can run a pressure valve to help correct this,” comments Burdue. Lastly, ICT Billet recommends the smallest, most compact Sanden 7176 air conditioning compressor if you’re planning on keeping A/C in the vehicle.
Using ICT Billet’s Online Guides to Get the Right Parts the First Time
In reality, swapping an engine is a science and an art at the same time. An easy, off-the-shelf complete LS engine accessory bracket kit may not be available for your particular application. Bringing in a trusted expert with plenty of experience can make all the difference between expensive headaches and getting it right the first time. “The most common mistake made is that people don’t know what parts they currently have. They might have a water pump and aren’t sure what parts go with that pump,” Burdue says.
This is where the team at ICT Billet really shines. “We make it easy to identify what you have with the guides section on our website. Here, builders can see all the water pumps ever used on an LS engine. They can easily compare to see what accessory they have so they are not buying things twice,” Burdue explains.
The guides that ICT Billet has created make planning your accessory drive setup much easier.
Other swap guides on the ICT Billet website include harmonic balancer, power steering pump, alternator, air conditioning compressor, plus many other LS engine components.
ICT Billet also makes it easy to sort through its selection of accessory brackets to find the perfect fit. “The guides always start at the top left of the page, in descending order on each column. The accessory starts in the highest position on the passenger side, then lowers for each bracket going down that column until it hits its lowest position,” Burdue says.
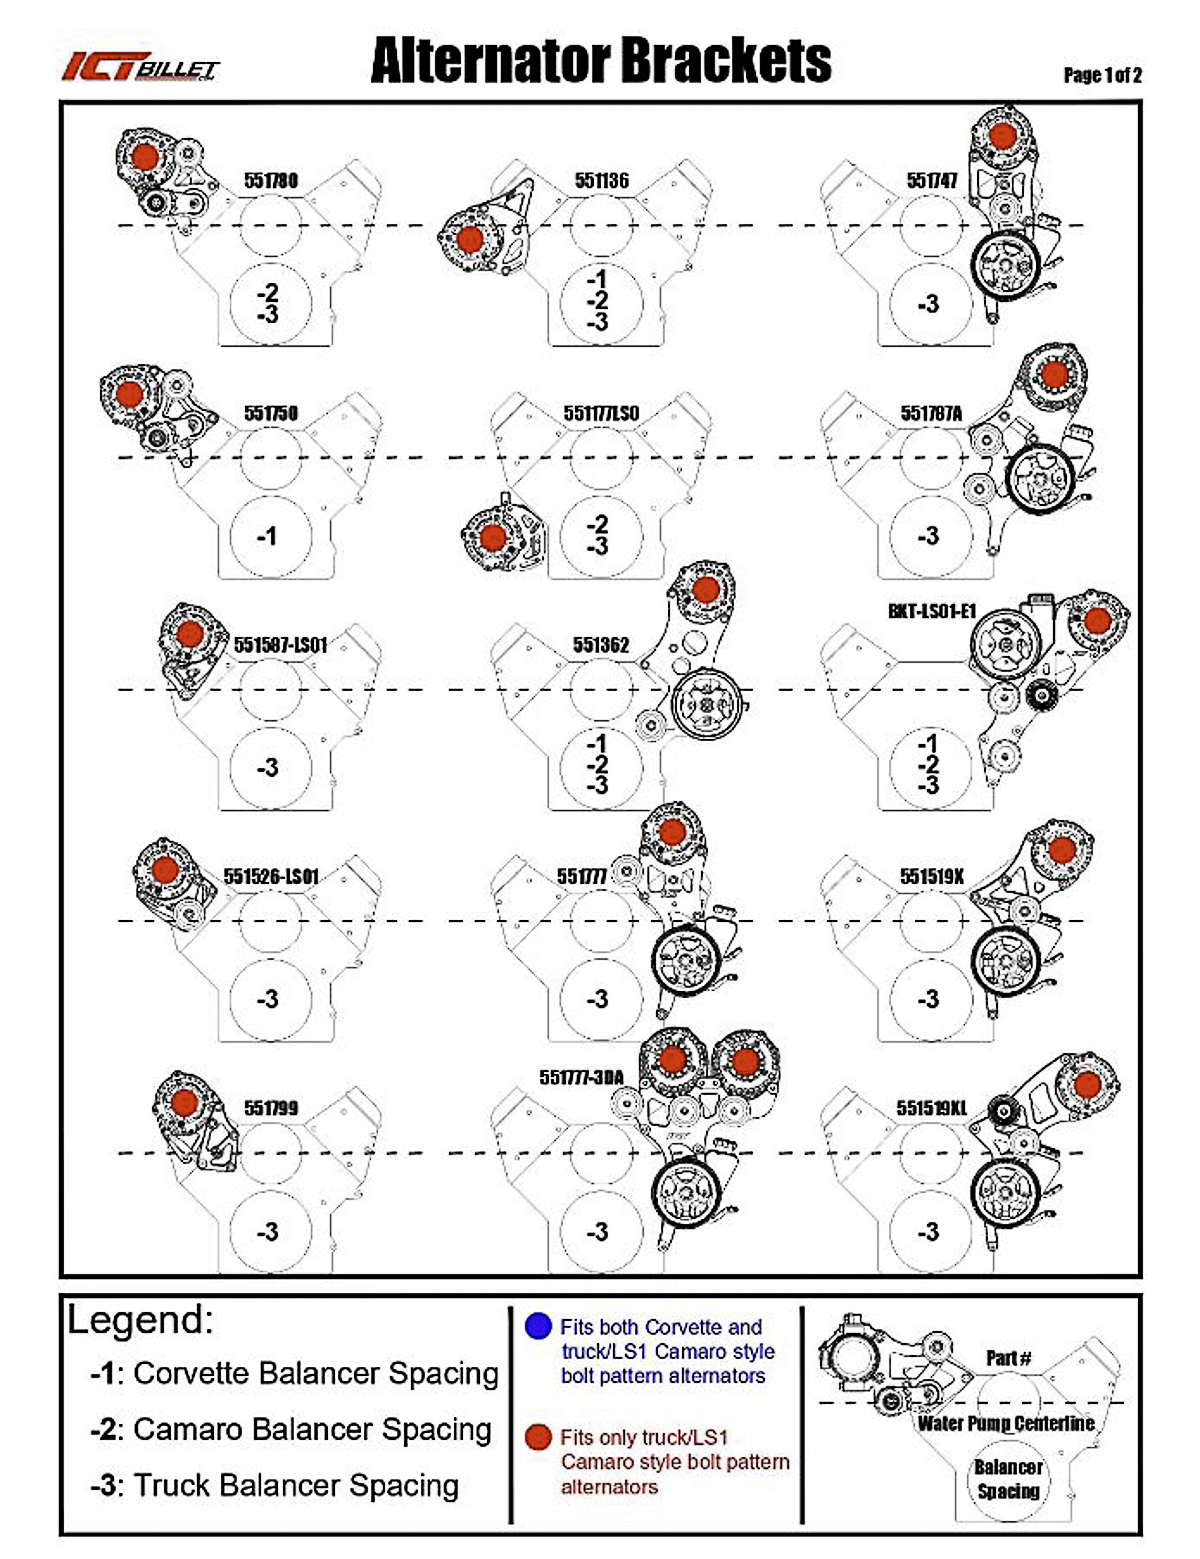
In the alternator guide example here, the dotted line references the center of the water pump and gives a clear reference to where the alternator will be positioned.
Furthermore, the part number is located at the top center of each diagram. Simply enter the part number in the search bar and the product description page provides a more in-depth description and bracket dimensions. The guides also provide a legend at the bottom of the page that shows all the accessory options. The center of the harmonic balancer also shows you which balancer spacings are available for each part number. Color coding adds a layer of compatibility.
Burdue praises the staff for their customer service, “If you need help, then we are just a text or phone call away from getting the right parts the first time. Our in-house experts have seen many wild setups and will get the correct parts fast.”
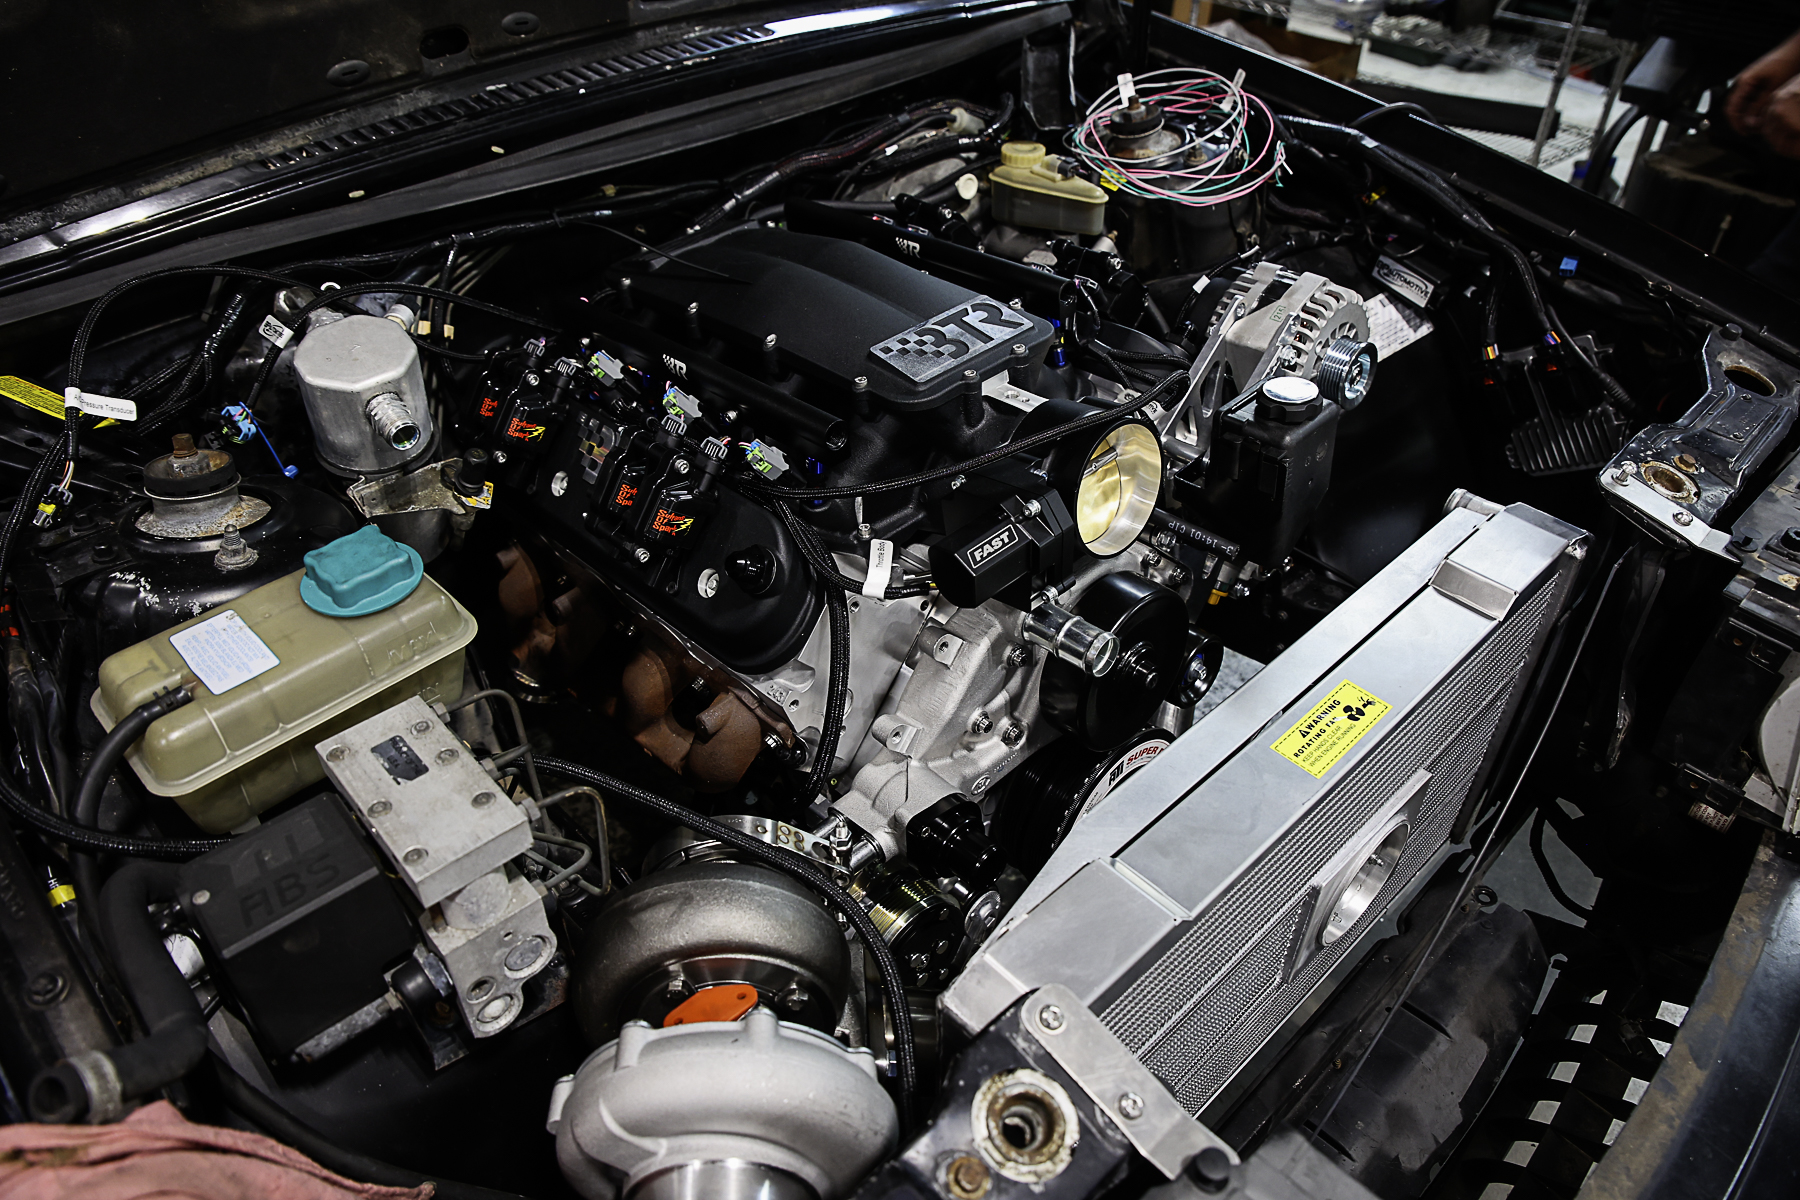
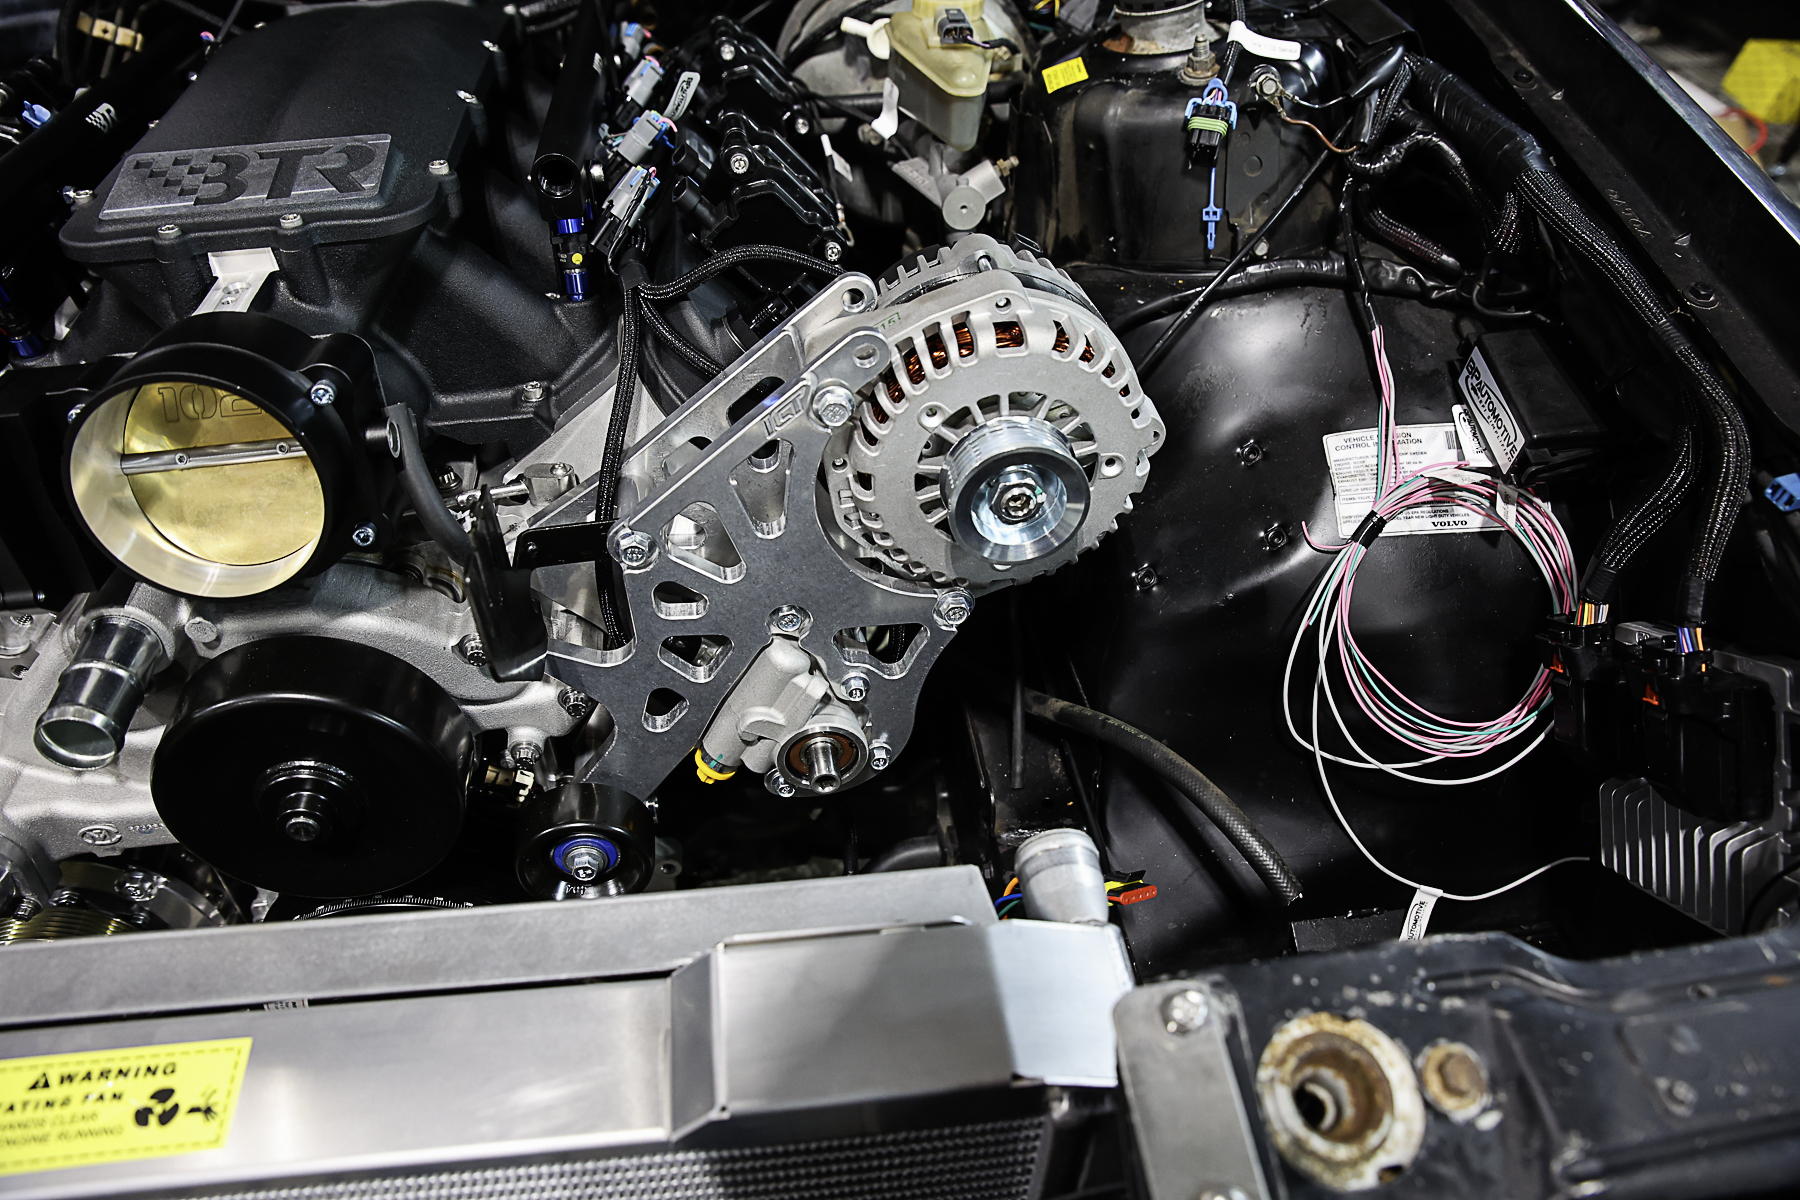
Here are the final results for our accessory drive system using the ICT Billet brackets. Everything is tucked away where we needed it and works with the turbo system. It makes it look like project Swedish Meatball came from Volvo with a single turbo LS engine
Now that we have all our proper brackets and spacing in place, it’s time to install the drive belt. “For street-driven vehicles, we recommend using an automatic belt tensioner so the customer does not over-tighten the belt tension, which could lead to breaking off the balancer pulley. We’ve seen this. Race applications should use a manual tensioner due to how quickly the engine revs, which can throw the belt due to belt slack on deceleration,” Burdue says. As a general rule of thumb, belt tension should measure 1/64-inch deflection per inch of span between the pulleys. For example, a 15-inch span is roughly 1/4-inch deflection.
Quality accessory brackets matter. It’s important to make sure you’ve done all the required measurements when you’re selecting brackets for your LS swap accessory drive. When you use the right brackets, your accessory drive will function like an OEM unit in your LS-swapped ride.